Choose the bottle path before the equipment
Use the arriving bottle’s state and drawing to screen the conveyor; confirm the handoff with samples at the intended rate. For incoming empty bottle pallet unloading, tier-sheet extraction, and single-filer buffer sizing, see the bulk glass and PET bottle depalletizer selection guide.
| Incoming state | Bottle material | First conveyor to evaluate | Handoff to check | Related guide |
|---|---|---|---|---|
| Empty, neck ring suitable for support | PET or other plastic | Neck-supported air conveyor | Neck finish to rinser feed; include each guide setting | Bottle conveyors |
| Empty, base-supported | Glass or rigid plastic | Tabletop chain with layer discharge and single-filing | Tier sheet removal, transfer gap and entry stability | Bottle depalletizers |
| Filled and capped | PET or other plastic | Tabletop chain or modular belt | Wall squeeze, guide contact and labeler spacing | Accumulation conveyors |
| Filled and capped | Glass | Base-supported conveyor with gentle transfers | Bottle contact, breakage recovery and pack grouping | Case packers |
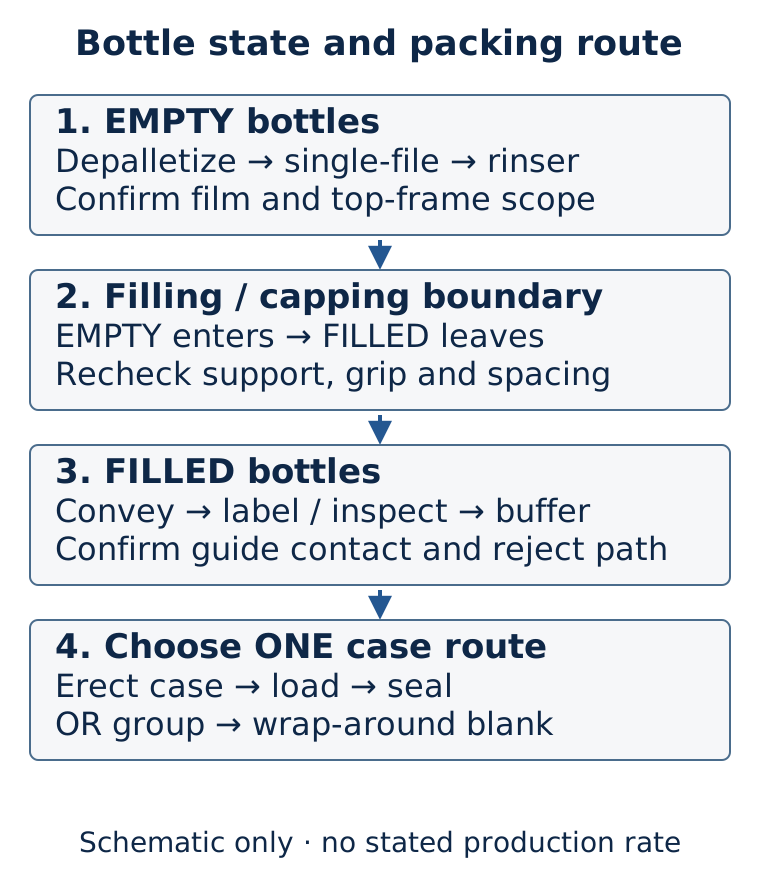
This guide follows the handoffs from empties to packed bottles. The applications hub connects it with case handling and pallet handling. Buffers between independent machines need both space for a stop and a way to recover afterward.
Stage by stage: problems and equipment
Depalletizing the empties
Empty bottles arrive on pallets, usually in layers separated by tier sheets, often with a top frame and stretch film. Film removal and top-frame handling are separate scope checks: they may be manual, integrated, or optional modules. Sidel’s public Sweepoff-A brochure describes film removal before pallet entry and a pad/frame remover inside the system (system sequence, PDF page 3; accessed October 8, 2026). The layer is then swept or placed onto a discharge table and the separator sheet removed. The first handling problem is the layer itself. Light plastic bottles can shift, lean, or lose their pattern in transit, and a layer that is not square is hard to sweep cleanly. Glass layers are heavy and less likely to move, but a single broken bottle in a layer can leave shards that stop a conveyor.
The bottle depalletizer guide explains the common methods in detail. For loose bulk loads of cans or plastic containers, see bulk depalletizers. Whatever the machine, the output is a mass of bottles on a table, and the next step is to turn that mass into an orderly single file.
Unscrambling and single-filing
Single-filing means narrowing a wide mass flow to one lane with a defined gap, so that the next machine sees one bottle at a time. Pressure combiners with guide rails do this by squeezing the flow, which works for stable containers but creates push on the bottles. Rotary unscramblers, recirculating tables, and loop-style tables aim to reduce that push. Check the proposed table with the actual bottle shape, full-buffer condition, and discharge rate; a generic single-filing speed does not establish suitability for tapered or unstable bottles.
A recirculating design handles a bottle that cannot enter the single-file channel by sending it back around for another try. That avoids forcing it into a gap and relieves the pressure at the combiner. The tradeoff is a larger table and, for light bottles, the chance that tumbling creates its own problems.
Conveying empties: tabletop or air
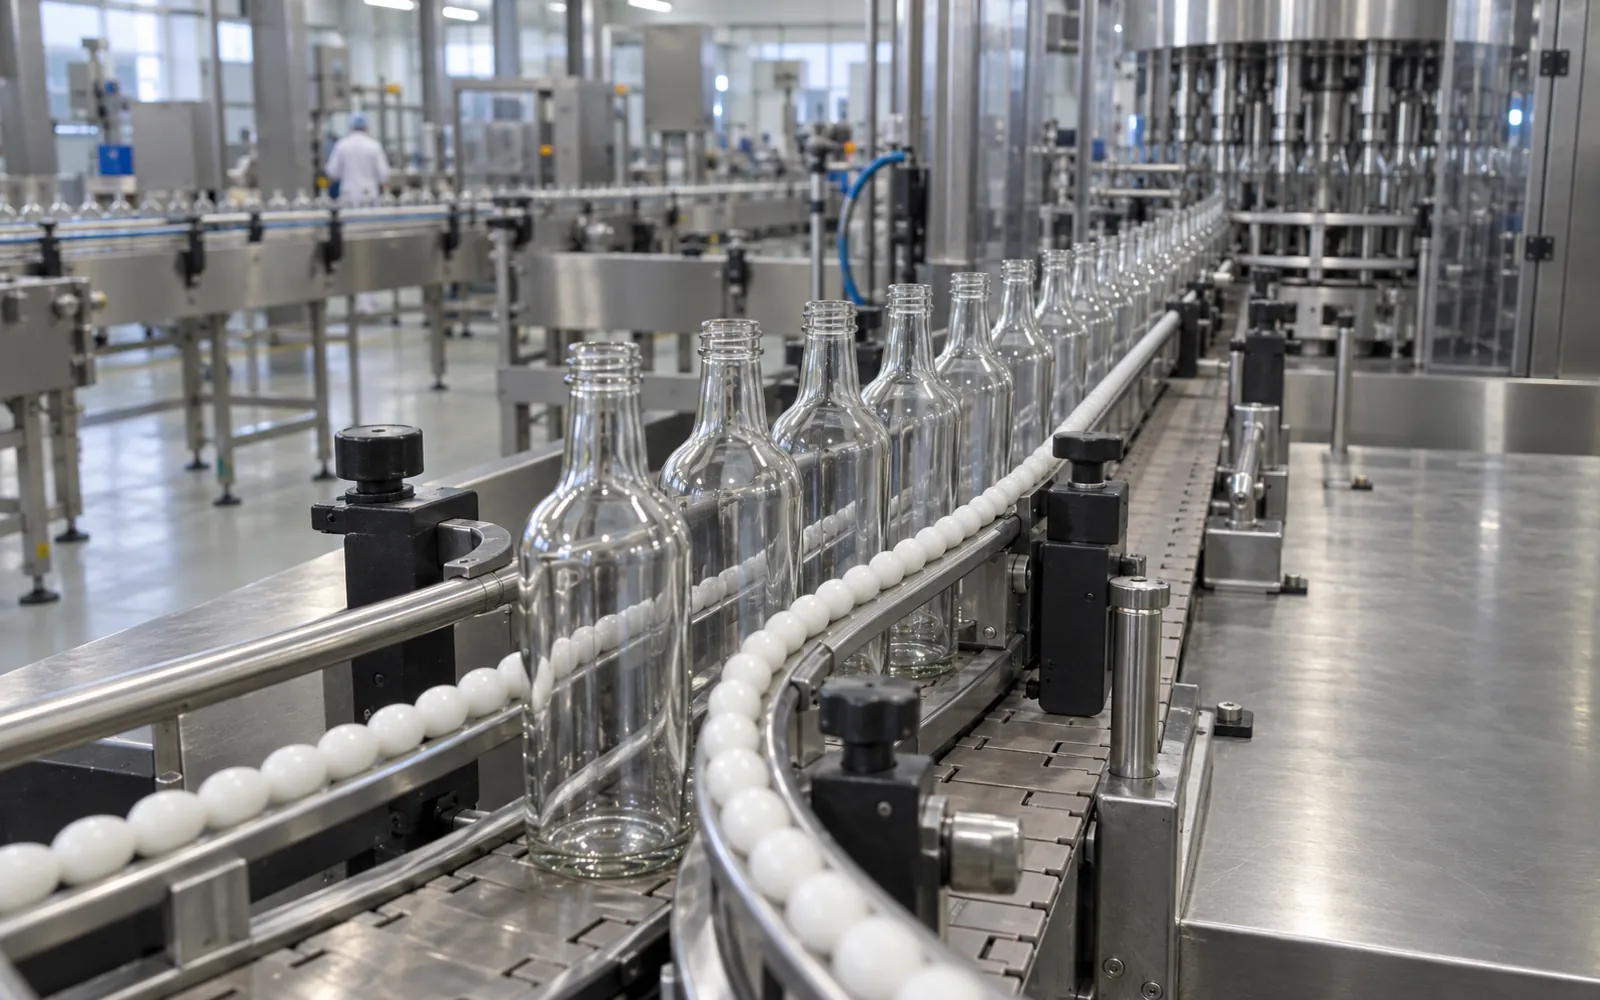
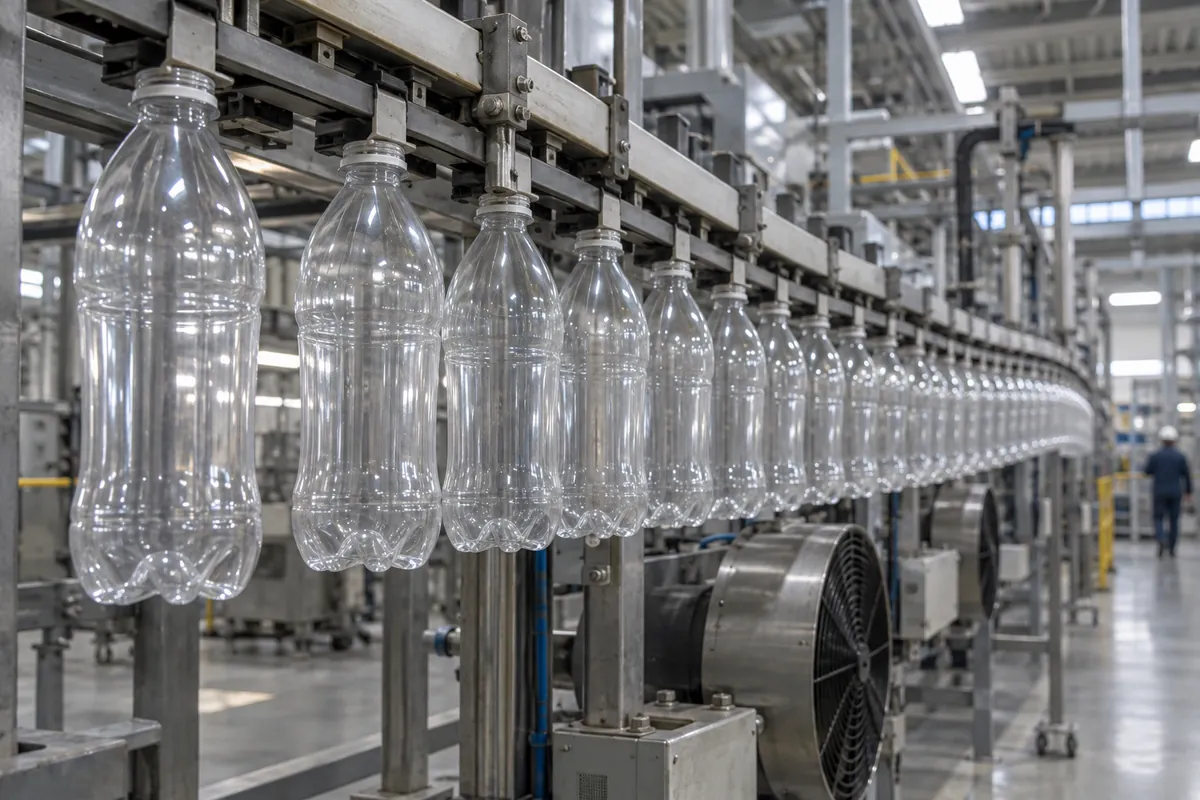
How empties travel to the filler depends on the container. Glass, and rigid plastic with enough base area, usually ride on a tabletop chain or modular belt between side guides. See the bottle conveyors guide for chain and belt types, guide design, and lubrication choices. Lightweight PET and HDPE with a neck ring are often hung by the neck instead. An air conveyor holds the bottle at the neck ring in a track and moves it with air from fans along the path. Confirm air direction near the open mouth, neck-guide fit, and recovery after a pallet change with the proposed equipment and bottle; capacity needs a format-specific basis.
Neck conveying has constraints. The bottle needs a neck ring or similar feature to hang from. The neck guides must fit the finish closely, because air leaks around loose tolerances and a mismatched neck can jam. One supplier warns that some builders use neck-guide lubricants to hide design flaws, which adds consumables and can conflict with hygiene rules. Ask how the neck guide is adjusted for a new finish.
Rinsing, filling, and capping
The filling block often runs as a tightly coupled machine, with rinser, filler, and capper linked by star wheels or a transfer conveyor. From a handling view, the block wants a steady stream with a defined gap. If bottles arrive in clumps, a transfer starwheel can miss a pocket or crush a bottle. If bottles arrive too sparsely, the filler is starved and its output drops. Many lines put a sensor-based gap control or a speed-matched feed conveyor in front of the block for this reason.
At the outlet, filled and capped bottles are heavier, wet, and often cold. Their weight makes them stable, but condensation reduces grip on dry belts and can foul label adhesive downstream. Wet areas need conveyors with open frames and sloped surfaces that drain, and hygienic design guidance from conveyor builders stresses easy-clean frames and minimizing places where product residue can collect. One conveyor maker’s hygienic-design article, listed in the references, covers the general principles.
Labeling, coding, and inspection
Labelers need a consistent spacing and a stable bottle. Rotary labelers take bottles from a starwheel, and in-line labelers carry the bottle past an applicator on a belt. In both cases, a bottle that wobbles or contacts its neighbor will show a crooked or wrinkled label. Coders and print-and-apply units need the bottle in a known orientation and distance.
Inspection stations commonly sit at three points. Empty-bottle inspection before the filler looks for cracks, chips, and foreign matter. After capping, fill level and cap checks confirm that the bottle is sealed and filled to the right height. After labeling, a vision or code reader checks presence, position, and legibility. Each station is only useful if its reject can leave the line without disturbing the others, which is why reject design gets its own section below.
Packing
The bottles then enter one packing route: a loader fills pre-erected cases, or a wrap-around machine folds a blank around the bottle group. INSITE by Douglas describes these as distinct configurations in its public case-packer article (Top Load and Wraparound sections; accessed October 8, 2026). Other formats include shrink wrap or trays. The case packers guide compares the machine types, and robotic case packing covers cells that can switch pack patterns by recipe. On the pre-erected route, a case erector supplies the empty case before loading and a case sealer closes it afterward. A wrap-around route forms and closes the blank around the group instead. From the bottle’s point of view, the question is how the group is formed. Gentle lane division with guide rails and a timing screw keeps glass from contact, while a fast, rough collation can chip finishes and mark labels.
Palletizing and out the door
Once packed, the bottle’s journey becomes a case handling problem, and finally a pallet handling one. Cases are merged, oriented, and fed to a case palletizer, with a tier sheet between layers if the product needs it. The final pallet is wrapped, labeled, and moved to the warehouse.
Handling problems that cut across the line
Stability
A bottle’s stability depends on the ratio of base width to height and on where its mass sits. An empty light bottle has a high center of gravity and little weight to resist a bump, and a filled bottle of the same shape is more stable. Tall, narrow, or tapered bottles need support rails at the neck or shoulder, and plants may add rails or a wider chain for the first few feet after a transfer, where bottles most often fall. Neck support on an air conveyor removes the problem for empties but does not help once they are filled.
Back pressure and accumulation
Back pressure builds whenever a conveyor queue is held back by a stopped machine downstream. In a mass flow, the weight of all the bottles behind the stop pushes forward. Supplier literature for loop-style tables describes a design that decouples the queue from the discharge, and states zero back pressure and no label damage for glass. When you evaluate a buffer, ask what pressure the bottle sees at full accumulation, what it sees at the discharge, and how fast it recovers after a stop. The accumulation conveyors guide explains the types.
Glass breakage
Glass fails from impact and from surface damage that weakens it. Bottle-to-bottle contact, rough transfers, and guide rails that are too tight or poorly aligned cause chips and scuffs. A broken bottle on a conveyor is also a safety and cleanliness event: shards can contaminate other bottles and must be cleared before restart. Plants reduce risk with low-pressure accumulation, gentle transfers with smooth, correctly spaced dead plates, plastic or composite wear strips, and by keeping drops small. Ask equipment suppliers for the drop height at every transfer and the speed difference between conveyors.
PET lightweighting
Brand owners reduce plastic weight by thinning walls and shortening or slimming necks. That makes bottles lighter to ship, but thinner walls generally tolerate less squeeze, less line pressure, and less rough contact. A shorter neck may no longer sit correctly in an air conveyor guide, or may release from the rails and jam. When a customer changes a bottle design, treat it as a line change: review neck guide fit, rail spacing, grip force in starwheels and grippers, pack pressure, and pallet stacking load. Running trial bottles of the new design through the line before a full rollout is a sensible check.
Changeover and change parts
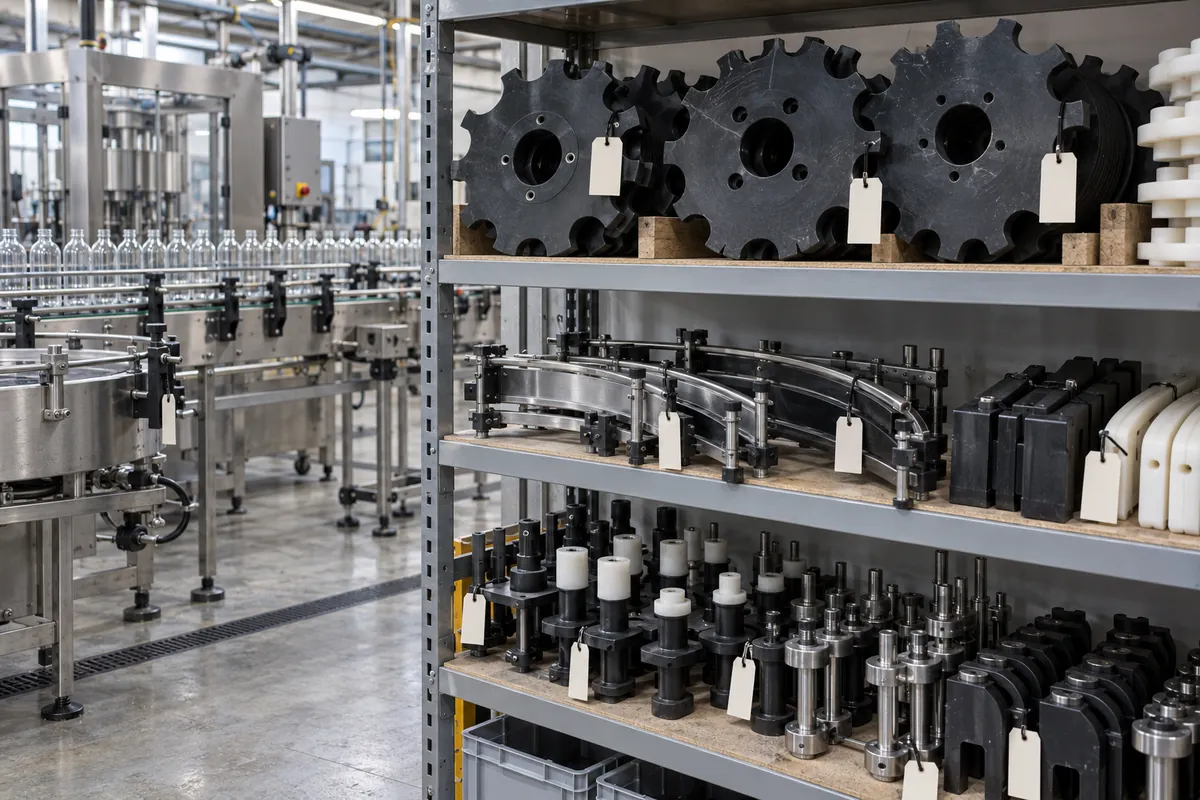
Every container size, shape, or finish may need a different set of guides, starwheels, timing screws, neck guides, grippers, dividers, and layer pads. A line that runs two bottle formats needs only a few. A contract packer with dozens needs a plan. Options include tool-free guide rails with indicator scales, recipe-driven motorized guides, a labeled storage rack for change parts, and a line standard that limits how many different neck finishes or base diameters are run. Count change parts early, because each format multiplies storage, validation, and training effort.
Inspection and reject
Inspection catches faults, and the reject station removes them. A reject can be a pusher arm, an air blast, a diverting gate, or a drop-out section, and the choice depends on bottle weight and fragility. Light bottles may need a gentle diverter, because an air blast can topple neighbors, and heavy glass may need a positive pusher. A reject lane should lead to a bin that can be seen and emptied safely, and the control system should confirm that the reject actually left the line, for example with a sensor at the bin entry. Without confirmation, a bad bottle can pass through, which defeats the check.
Integration and controls
Bottle lines are controlled as a set of linked machines. A line controller or PLC network typically coordinates start-up, stop, and speed, so that machines downstream of the filler slow down or stop in order when a packer or palletizer pauses, and machines upstream hold their product. Sensors at accumulation zones signal “full” and “starved,” and the controls adjust conveyor speeds to keep each buffer within a target band. Counters or encoders at key points record throughput and reject counts. The point of this logic is to avoid abrupt stops and to let the slowest machine set a gentle pace for the rest.
Two integration points are worth special attention. The hand-off at the filler is the most sensitive, since it determines how tightly the front and back ends are coupled. The buffer between the labeler and the packer matters because it lets the packer run through short stops at the front. The line design guide and the layout guide cover this thinking, and the packaging line layout guide works through floor space and routing.
Safety applies at every transfer and guard. In general industry in the United States, machine guarding falls under 29 CFR 1910.212, and plant lockout procedures govern servicing. Conveyors have pinch points and nip points at transfers, and glass lines add a laceration risk during jam clearing. Guarding should allow clearing without reaching into moving parts.
Design considerations
- Begin with the bottle drawing: base diameter, height, neck finish, wall thickness, weight, and surface. Specify filled and empty states separately.
- Define the filler’s rated speed, then work out the speed and gap each conveyor must deliver to feed it. Ask suppliers to state speeds in bottles per minute for your bottle, not a generic figure.
- Decide how long the line must keep running through the typical stop at each machine, size accumulation for that time, and keep the buffer where it can be refilled quickly.
- Wet and washdown zones need drainage, smooth surfaces, and materials that handle the cleaning chemistry. Dry zones can use simpler frames.
- A plant that runs both glass and plastic should plan for the most fragile and the lightest container, or accept separate lines or modular conveyor sections.
- Count the formats and the parts they need, and pick adjustable or recipe-driven guides if the count is high.
- Check ceiling height for air conveyors and fan placement, aisle clearance, and floor loading for filled-bottle accumulation.
- Conveyors, tables, and guarding add up. The conveyor cost guide lists the factors that move price.
Illustrative example
The configuration below is a hypothetical line for a mid-volume beverage plant that runs lightweight plastic bottles, illustrating how the equipment stages connect in sequence.
- A bottle depalletizer takes layers of empties and removes tier sheets to a stacker.
- Empties move to an air conveyor that hangs them by the neck and feeds the rinser, with a dual-position neck guide for two neck finishes.
- The filler, capper, and a fill-level inspection form the filling block, with a gap-control feed conveyor ahead of the rinser.
- Filled bottles ride on tabletop chain through a labeler and a coder, with a vision check and a pusher reject.
- A zero-pressure accumulation table sits before the packer to ride out short stops.
- Choose one case route: pre-erected case — case erector → bottle loader → case sealer; or wrap-around — bottle collation → blank formed and closed around the group. The erector is not a stage after the wrap-around packer.
- Case conveyors feed a robotic palletizer with layer pads, followed by a stretch wrapper and a pallet label applicator.
In a glass version of the same plant, the air conveyor would be replaced by tabletop chain with loop or recirculating accumulation, and the reject stations would favor positive pushers. See the beverage packaging, bottled water packaging, and brewery packaging pages for how these choices vary by industry.
Where to go next
The equipment map shows each machine in the stack. After packing, the story continues in case handling and then pallet handling. The palletizing hub, depalletizing hub, and conveyors hub cover the machines at each end and between them.